
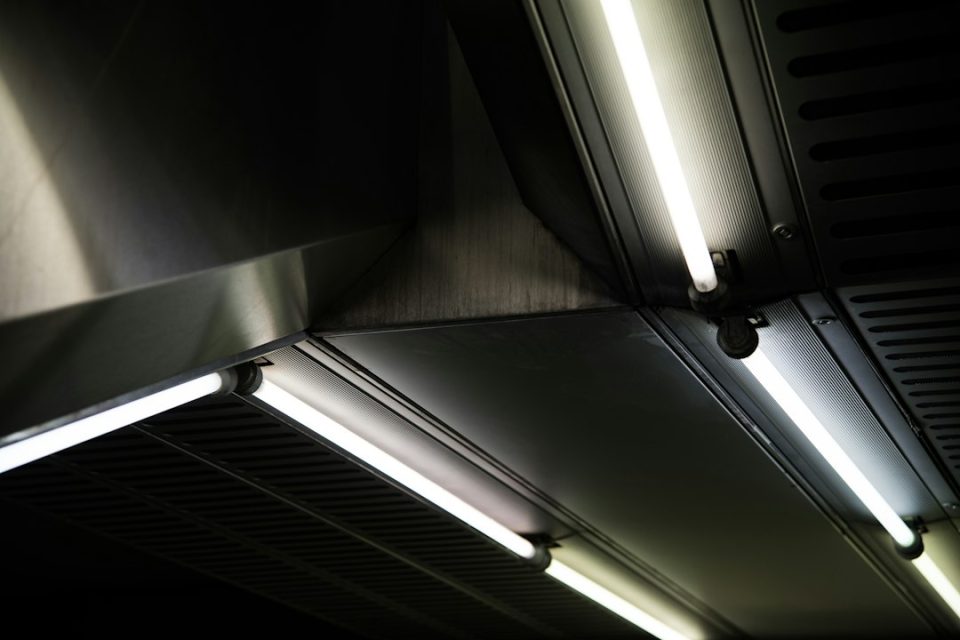
It’s a common question: how do you keep your linear lights shining bright and performing their best? The good news is, with a little regular attention, maintaining optimal performance from your linear lighting systems isn’t overly complicated. Think of it like taking care of a good tool; a little cleaning and occasional check-up goes a long way in ensuring it does its job efficiently for years to come. This guide will walk you through the practical steps to keep your linear lights in top shape, focusing on what you actually need to do, without the fluff.
Understanding Your Linear Lighting System
Before we get into the nitty-gritty of cleaning, it’s helpful to have a basic understanding of what makes your linear light tick. This isn’t about becoming an electrical engineer, but knowing the core components can help you identify potential issues and approach maintenance more effectively. Most linear lighting systems, whether they’re integrated LED fixtures or traditional fluorescent tubes within a housing, share similar fundamental elements.
Key Components to Consider
Your linear light fixture typically consists of several key parts. The light source itself, often an LED strip or module, is what produces the illumination. This source is usually housed within a fixture body, which provides structural support and often includes optics like diffusers or lenses to shape the light. The power supply, or driver in the case of LEDs, converts the incoming electrical current to the correct voltage and amperage for the light source. Finally, mounting hardware secures the fixture in place, and connectors ensure proper electrical hookup. Understanding these pieces helps you differentiate between a dirty diffuser and a failing LED module, for instance.
The Role of Heat Dissipation
One often overlooked but critical aspect of LED linear lighting, in particular, is heat dissipation. LEDs generate heat, and if this heat isn’t effectively managed and allowed to escape, it can significantly reduce the lifespan and performance of the light source. Many linear fixtures incorporate heatsinks, often integrated into the fixture body itself, to draw heat away from the LEDs. Blocked airflow or accumulated dust on these surfaces can hinder this process, leading to premature component failure or diminished light output. Keeping these areas clear is just as important as cleaning the light-emitting surface.
Essential Cleaning Practices
Cleaning your linear lights isn’t just about making them look good; it’s fundamental to maintaining their optimal light output and efficiency. Dirt, dust, and grime can drastically reduce the amount of light reaching your space and even impact the thermal performance of LED fixtures.
Regular Dusting and Wiping
This is your first line of defense and the most frequent task. Dust and airborne particles accumulate on all surfaces, including your light fixtures. A simple, regular dusting can prevent heavier build-up.
Frequency and Tools
For most indoor environments, a weekly or bi-weekly dusting with a soft, lint-free cloth or a microfiber duster is usually sufficient. For areas with higher dust levels, like workshops or manufacturing floors, you might need to increase this frequency. The key is consistency. A feather duster can be effective for initial removal, but a microfiber cloth will capture finer particles more effectively. For hard-to-reach areas, an extendable duster can be invaluable. Avoid using abrasive materials that could scratch the diffuser or fixture surface.
Addressing Diffuser Build-up
The diffuser, often a plastic or acrylic cover that softens the light, is where most light output reduction due to dirt occurs. Dust and oily films from cooking or environmental pollutants can cling to this surface. For these situations, a damp cloth is often necessary. Lightly dampen a clean microfiber cloth with plain water or a very mild, non-abrasive cleaning solution. Gently wipe down the diffuser. Ensure the cloth is not dripping wet, as moisture shouldn’t enter the electrical components. After wiping with a damp cloth, follow up with a dry, clean microfiber cloth to remove any streaks or residual moisture.
Tackling Stubborn Stains and Grime
Sometimes, regular dusting isn’t enough. Grease, smoke residue, or other environmental contaminants can create a more stubborn film that requires a bit more effort to remove.
Choosing the Right Cleaning Solution
When water isn’t enough, you need a cleaning agent. However, it’s crucial to select the right one to avoid damaging the fixture. Always start with the mildest option. A solution of mild dish soap (a few drops) in warm water is often very effective for general grime. For more specific issues like grease, a non-abrasive, ammonia-free, and alcohol-free glass cleaner can work on non-plastic diffusers. Always test any new cleaning solution on an inconspicuous area of the fixture first to ensure it doesn’t cause discoloration or damage. Avoid harsh chemicals, abrasive cleaners, or solvents like acetone, paint thinner, or strong alkaline detergents, as these can easily haze, crack, or yellow plastic diffusers and damage painted or anodized metal finishes.
Safe Application Techniques
When using a cleaning solution, always spray or apply it to your cleaning cloth first, rather than directly onto the light fixture. This prevents overspray from entering electrical components or getting into areas where it might cause damage. Gently wipe the affected area, applying light pressure. For very stubborn spots, you might need to let the cleaning solution sit for a very short period (a minute or two) to loosen the grime before wiping. Always rinse the area with a clean, damp cloth (using only water) afterward to remove any residue from the cleaning solution, and then dry thoroughly with a separate, clean cloth.
Cleaning Heat Sinks and Vents
As mentioned earlier, good heat dissipation is vital for LED longevity. Over time, dust and debris can accumulate on heatsinks and in ventilation openings, impeding airflow.
Safe Removal of Debris
Before touching any internal components, always ensure the power to the fixture is turned off at the circuit breaker. Once power is off, you can safely inspect heatsinks and vents. A soft brush, like a clean paintbrush or a dedicated electronics cleaning brush, can be used to gently dislodge dust from finned heatsinks. For smaller crevices or vents, a can of compressed air can be very effective at blowing out accumulated dust. Hold the can upright and use short bursts to avoid moisture buildup. Be careful not to force debris further into the fixture. If internal components are easily accessible and heavily soiled, a very gentle vacuum cleaner with a brush attachment can be used, but extreme care must be taken to avoid static discharge or dislodging connections.
Inspecting for Optimal Performance
Cleaning is just one part of the maintenance puzzle. Regular inspections help you catch potential issues before they escalate, ensuring your linear lights continue to deliver consistent and efficient illumination. This isn’t about daily scrutiny, but rather periodic checks that can save you headaches down the line.
Visual Checks for Damage or Wear
A quick visual inspection can reveal a lot. It’s about looking for anything that seems out of place or shows signs of deterioration.
Casing and Mounting Hardware
Examine the fixture’s housing for any visible signs of damage, such as cracks, dents, or corrosion. These could indicate impact damage or environmental exposure that might compromise the fixture’s integrity or internal components. Pay close attention to the mounting hardware. Are all screws tight? Is the fixture securely fastened to its mounting surface? Loose mounting can lead to vibration, stress on electrical connections, and potentially safety hazards. If you notice any loose hardware, gently tighten it. If components appear corroded or significantly damaged, consider replacement or professional assessment.
Diffuser Condition
Beyond cleanliness, check the diffuser for signs of yellowing, hazing, or cracking. Over time, particularly with certain plastics or exposure to UV light, diffusers can degrade. Yellowing significantly reduces light output and alters the color temperature of the light. Cracks can allow moisture and dust to enter the fixture, potentially damaging internal components. If a diffuser is severely degraded, replacement is usually the best option to restore light quality and protect the fixture’s internals.
Cable and Connector Integrity
This is a critical safety check. Inspect all visible cables and connectors for fraying, nicks, or discoloration. Damaged insulation can expose live wires, creating a shock hazard or short circuit risk. Look for signs of overheating at connectors, such as melted plastic or discolored insulation. If you spot any damage to cables or connectors, do not attempt to fix it yourself unless you are a qualified electrician. Immediately disconnect power to the fixture and arrange for professional repair or replacement.
Light Output and Color Consistency
One of the primary indicators of optimal performance is the quality of the light itself. Over time, even LEDs can experience some lumen degradation (dimming) or subtle color shifts.
Observing Light Levels
Periodically, simply observe the light output. Does the area feel adequately lit? Do certain fixtures appear noticeably dimmer than others of the same type in the same area? While difficult to quantify without a light meter, a subjective assessment can often flag issues. A sudden and noticeable drop in light output from a single fixture might indicate a failing power supply or LED module. Gradual dimming across multiple fixtures could be normal aging, but if it’s significant and premature, it might point to environmental factors or inadequate power supply.
Detecting Color Shifts
With LED lighting, color consistency is generally good, but subtle shifts can occur. Notice if the light from a particular fixture looks distinctly different (e.g., greener, bluer, or yellower) compared to adjacent, identical fixtures. This could indicate a failing LED driver or a batch inconsistency in the LED modules. While not always a functional problem, color shifts can be aesthetically displeasing and impact the desired ambiance or task visibility. Documenting these observations can be helpful if you need to contact the manufacturer or a service technician.
Troubleshooting Common Issues
Even with regular cleaning and inspection, issues can arise. Knowing how to approach basic troubleshooting can help you identify problems and determine whether a professional is needed or if it’s a simple fix.
Flickering or Intermittent Operation
Flickering lights are not only annoying but can also indicate a problem with the fixture or its power supply.
Power Supply (Driver) Issues
For LED linear lights, the driver is often the culprit behind flickering. An aging or faulty driver might not be supplying a stable current to the LEDs. If multiple fixtures on the same circuit are flickering, the issue could be with the main power supply or dimmer switch (if applicable). If only one fixture is flickering, and it’s an LED fixture, a failing driver is a strong possibility. In most cases, replacing the driver is the solution. This is an electrical repair that should only be attempted by a qualified individual.
Loose Connections
Sometimes, the simplest explanation is the right one. A loose wire connection, either at the power source, within the fixture itself, or at connection points between modular linear sections, can cause intermittent power delivery and lead to flickering. Before checking connections, always turn off power at the circuit breaker. Visually inspect accessible connections for any signs of looseness or corrosion. If you’re comfortable and qualified to do so, carefully re-seat connectors. If the issue persists, professional assistance is recommended.
Complete Failure (No Light)
When a linear light completely stops working, it narrows down the possibilities considerably.
Blown Fuses or Tripped Breakers
This is the first and easiest thing to check. If the entire circuit where the light is located is off, check your electrical panel for a tripped breaker. If only one light is out, and it’s an older fluorescent fixture, check if it has an internal fuse (though many modern fixtures don’t). Replacing a fuse or resetting a breaker is a straightforward fix, but if a breaker trips repeatedly, there’s a deeper electrical issue that needs professional attention.
Faulty Light Source or Driver
If the power supply to the fixture is confirmed, the problem lies within the fixture itself. For LED linear lights, it’s typically either the LED module(s) or the driver. Drivers are often the weaker link and fail more frequently than the LEDs themselves. For older fluorescent fixtures, it could be a burnt-out tube or a failing ballast. Identifying which component is at fault usually requires testing with a multimeter, a task best left to electricians or technicians with the proper tools and knowledge.
Dimming or Reduced Light Output
Beyond normal lumen depreciation, a noticeable and premature reduction in brightness can point to specific problems.
Accumulation of Dirt and Debris
We’ve covered this extensively, but it bears repeating: the most common and easily preventable cause of dimming is dirt and grime on the diffuser. A thorough cleaning often restores much of the lost light output. Don’t underestimate the impact of a dirty lens.
Overheating LEDs
If your LED linear fixture is noticeably dimmer than it should be, and it’s not due to dirt, overheating could be a factor. This usually happens if the fixture is installed in an environment hotter than its rated temperature, or if its heatsinks are blocked by dust and debris (refer back to the cleaning heatsinks section). Overheating accelerates lumen depreciation and can damage the LED components. Ensuring proper ventilation and keeping heatsinks clean is crucial. In some cases, if the fixture is in an excessively hot location, a different type of fixture designed for higher ambient temperatures might be needed.
When to Call a Professional
While regular maintenance and basic troubleshooting can handle many common issues, there are definitely times when it’s best to step back and let an expert take over. Your safety and the proper functioning of your electrical system are paramount.
Complex Electrical Issues
Any problem involving the main electrical wiring, consistent circuit breaker trips, or visible damage to conduit or electrical boxes should immediately signal the need for a qualified electrician. Messing with main wiring without proper training can be extremely dangerous, risking electric shock, fire, or further damage to your electrical system. This includes issues like recurring shorts, wiring that feels hot to the touch, or buzzing sounds coming from the electrical panel.
Internal Component Replacement
While cleaning diffusers and even replacing external hardware might be manageable for a handy individual, replacing internal electrical components like LED drivers, LED modules, or ballasts usually requires specific knowledge, tools, and an understanding of electrical safety. These components often involve high voltage and precise wiring. Attempting these repairs without proper qualifications can void warranties, create safety hazards, or lead to further damage to the fixture. A professional will have the diagnostic tools to pinpoint the exact faulty component and the expertise to replace it safely and correctly.
Warranty and Specialized Fixtures
If your linear lighting system is still under warranty, attempting unapproved repairs yourself will almost certainly void it. In such cases, contact the manufacturer or the authorized service provider. They can guide you on approved troubleshooting steps or arrange for professional service that keeps your warranty intact. Additionally, some linear lighting systems are highly specialized, perhaps integrated into building management systems, or designed for specific industrial or hazardous environments. These fixtures often require specialized knowledge for maintenance and repair. Don’t risk compromising their intended function or safety features by attempting DIY repairs.
Safety Concerns
Any situation that presents a direct safety hazard, such as exposed live wires, sparks, smoke, or a strong burning smell, requires immediate action. Disconnect power to the affected area at the circuit breaker if it’s safe to do so, and then call a qualified electrician or emergency services if the situation warrants it. Never attempt to investigate or fix an active electrical hazard yourself. Your safety is always the top priority.